Introduction
Most schools and universities in China have a limited number of GPU servers (often only one or two, or even none). This makes the management of GPU development machines quite different than corporation which have virtually unlimited GPU servers.
Let’s consider a normal lab environment with 12 students, each needing a GPU server for their projects, and we have one GPU server with 8 GPUs available.
- If we give each student a dedicated GPU server, we would need 12 servers, this is impractical and costly.
- If we let all the students share a single GPU server (all students have access to all resources), it would be very difficult to manage, as each student would need to install their own software and dependencies, leading to conflicts. Soon the GPU server will become a hot mess. Making each student use a different user account would not solve the problem, as they would still share the same OS and software environment, and will potentially break each other’s environment.
- If we make use of IOMMU and PCIe passthrough, we can assign a virtual machine with one dedicated passthrough’d GPU to each student. This approach has almost no interference between students, as each student has their own OS and software environment, even with it’s own GPU. However, this leads to a lot of wasted resources, because most of the time the GPU is idle, and each student will only have access to one GPU at a time, even if all of the GPUs are idle.
- If we use GPU virtualization, we can assign a virtual machine with a shared GPU to each student. This way, each student can use the GPU resources as needed, and the GPU can be shared among multiple students. This approach is more efficient and cost-effective, as it allows for better resource utilization. However, it requires a GPU that supports virtualization, such as NVIDIA’s vGPU or AMD’s MxGPU. Most consumer GPUs do not support virtualization, so this approach is not feasible for most schools and universities.
This is where containerization comes in. By using containerization, we can create a shared GPU development server that runs a container for each student. Each container can have its own software environment, and all (or some of) of the GPUs can be shared among multiple containers. This approach is more efficient and cost-effective, as it allows for better resource utilization, and does not require a GPU that supports virtualization. However, it should be noted that this approach is not as isolated as virtual machines, as all containers share the same kernel and GPU resources. Therefore, it is important to ensure that the containers are properly configured, and that the students are aware of the limitations and potential issues that may arise from sharing the same GPU resources (for example, if one student runs a GPU-intensive task, it may affect the performance of other students’ containers).
We will be using the CT (LXC Containers) in Proxmox VE to achieve this. Why not use Docker? Because Docker is meant for running applications, not for running full Linux distros. Although you can use something like sysbox to run a full Linux distro in Docker, i would still prefer to use LXC Containers, as they are built for this purpose and are already built into Proxmox VE, making it easier to manage and deploy.
Proxmox VE Installation
Download the latest Proxmox VE ISO from the official website. At the time of writing, the latest version is Proxmox VE 9.0. Use whatever method you prefer to install Proxmox VE, such as using a USB drive.
I will use IPMI of the server to install Proxmox VE, as it is the most convenient method for me. You can also use a monitor and keyboard to install Proxmox VE if you prefer.
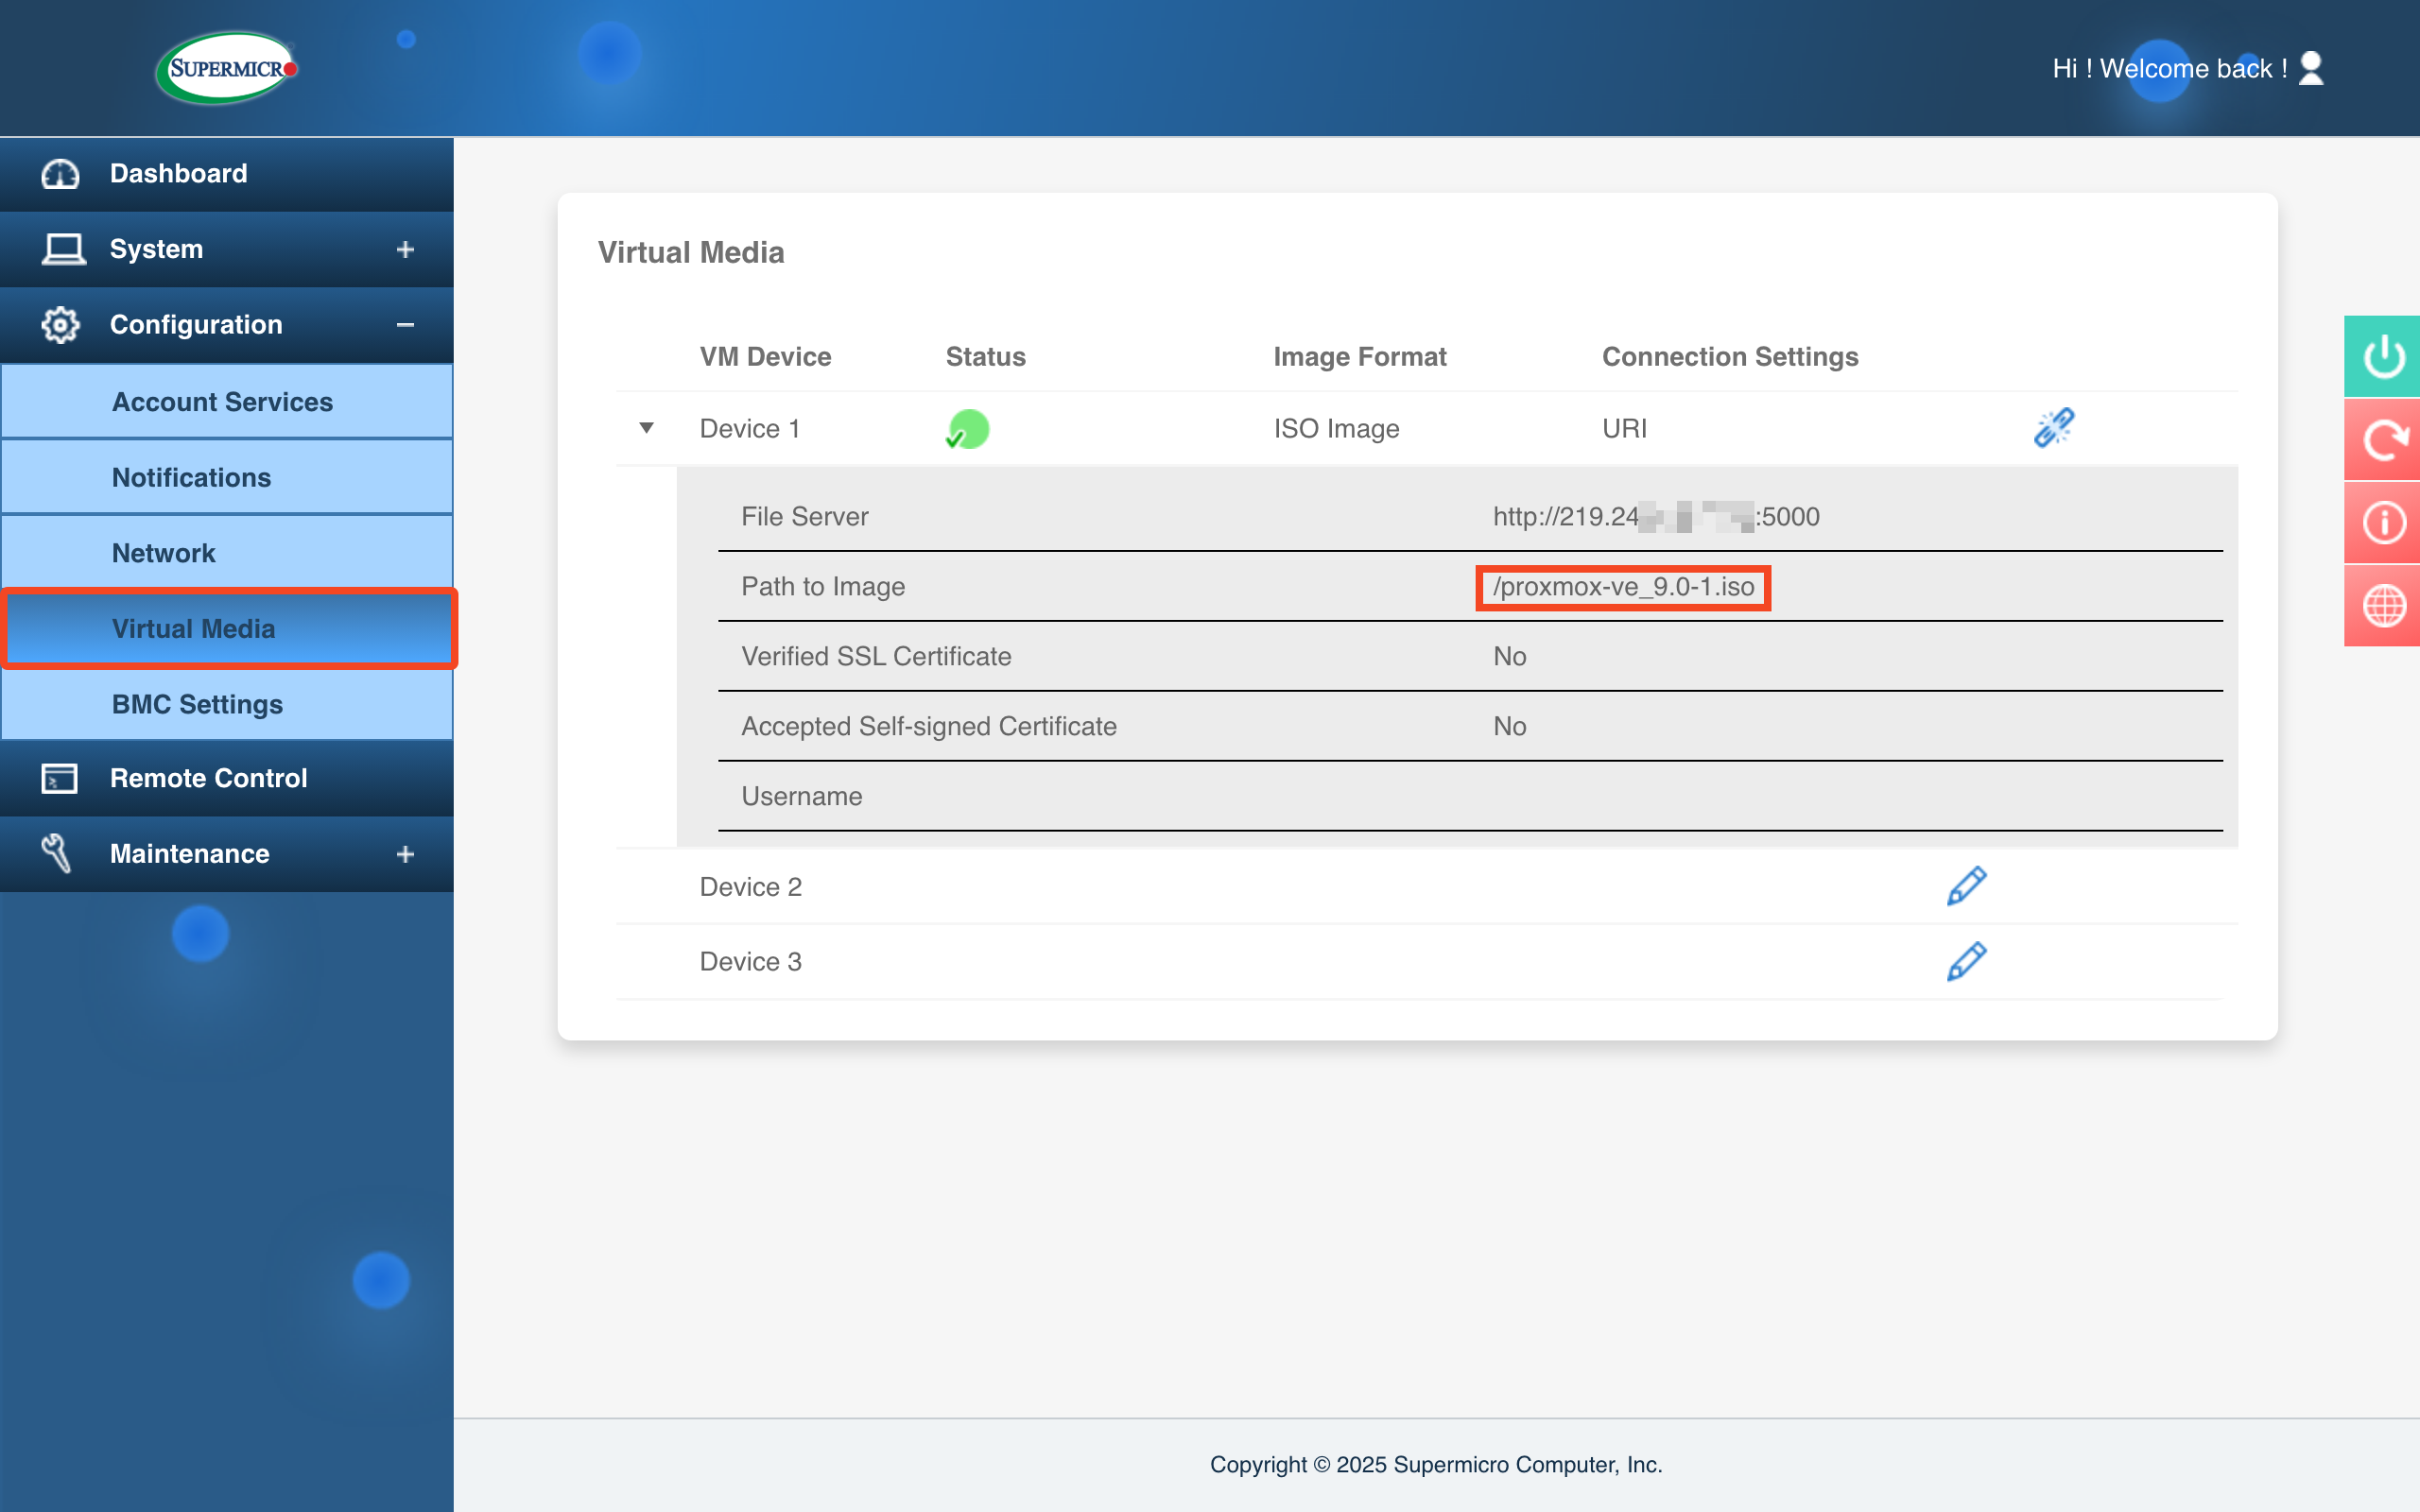
Mount the Proxmox VE installation ISO as virtual media so we can boot into.
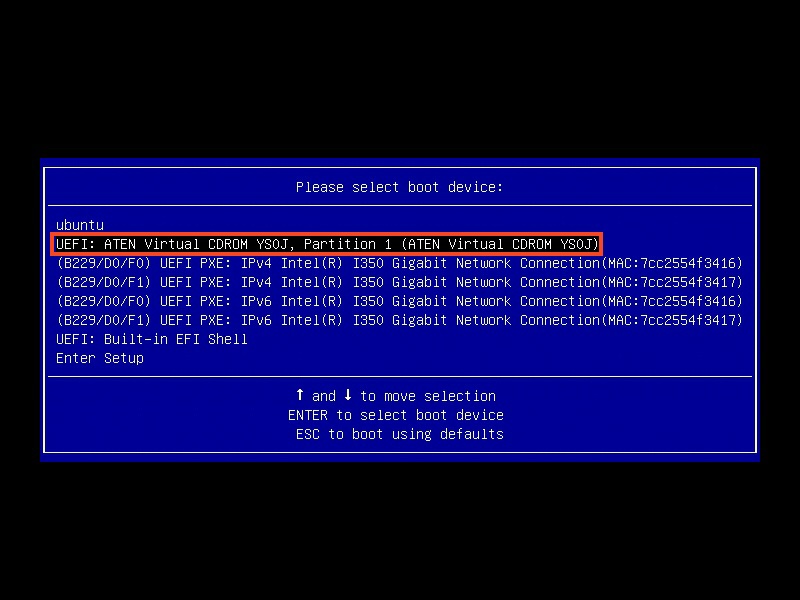
Now reboot the server into the virtual media. Supermicro motherboards lets you invode the boot menu using F11. Your motherboard may have a different shortcut.

Choose our CDROM virtual media.
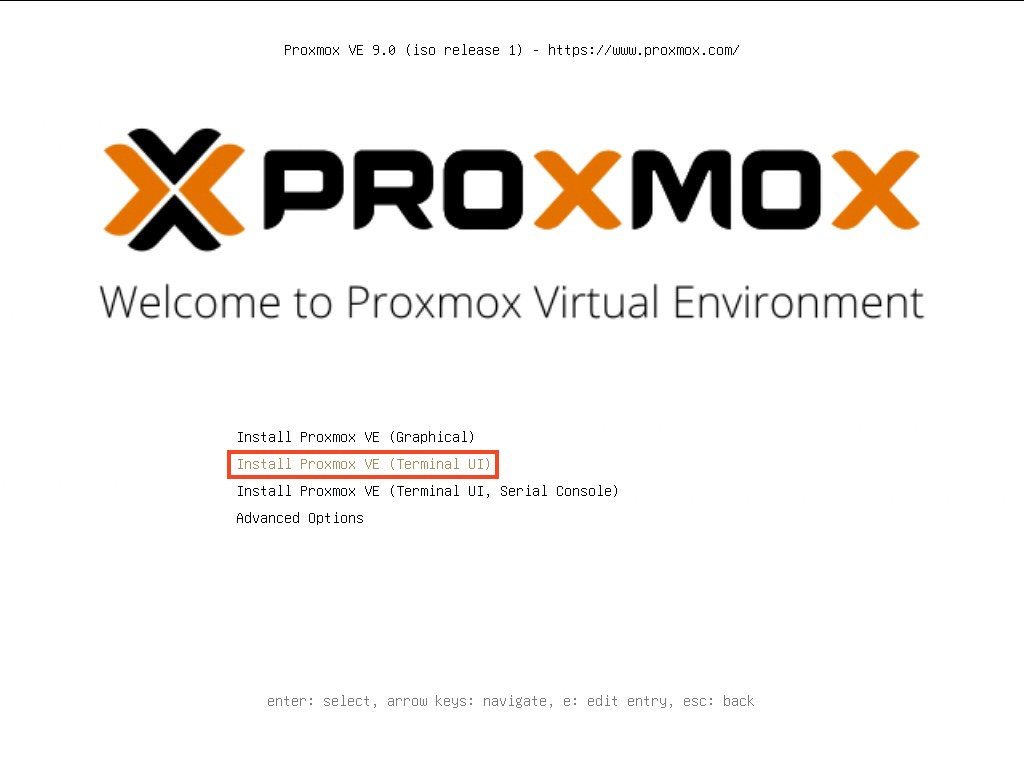
Boot into the Proxmox install menu (I prefer terminal UI over GUI ones).
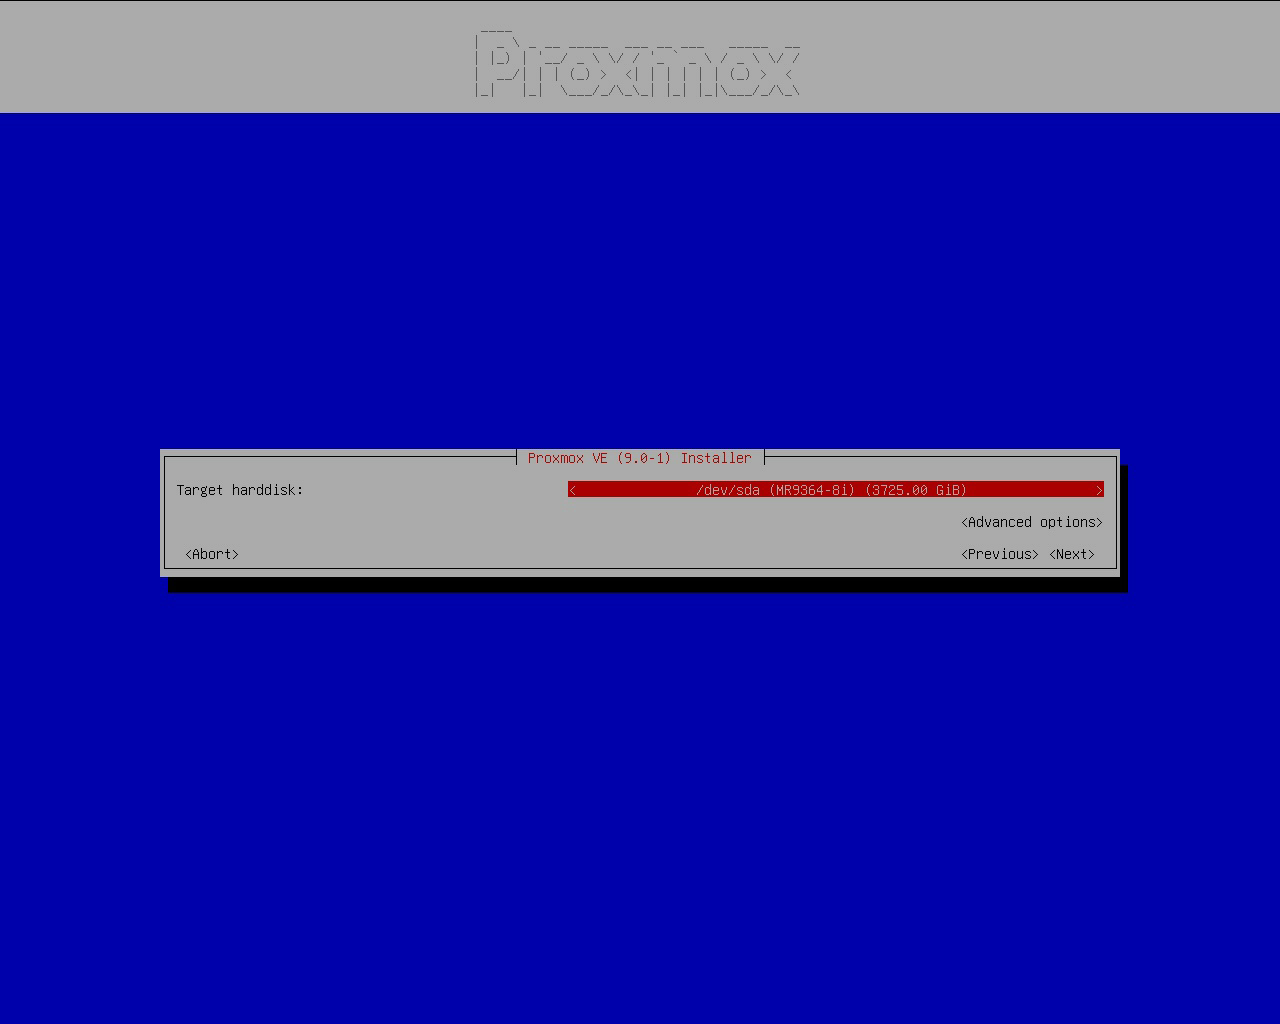
After you accepted the license, you will need to choose the target installtion disk. You should choose the boot SSDs on your server, not data drives. The drive in picture is 3*1.92TB SSDs in RAID 5.
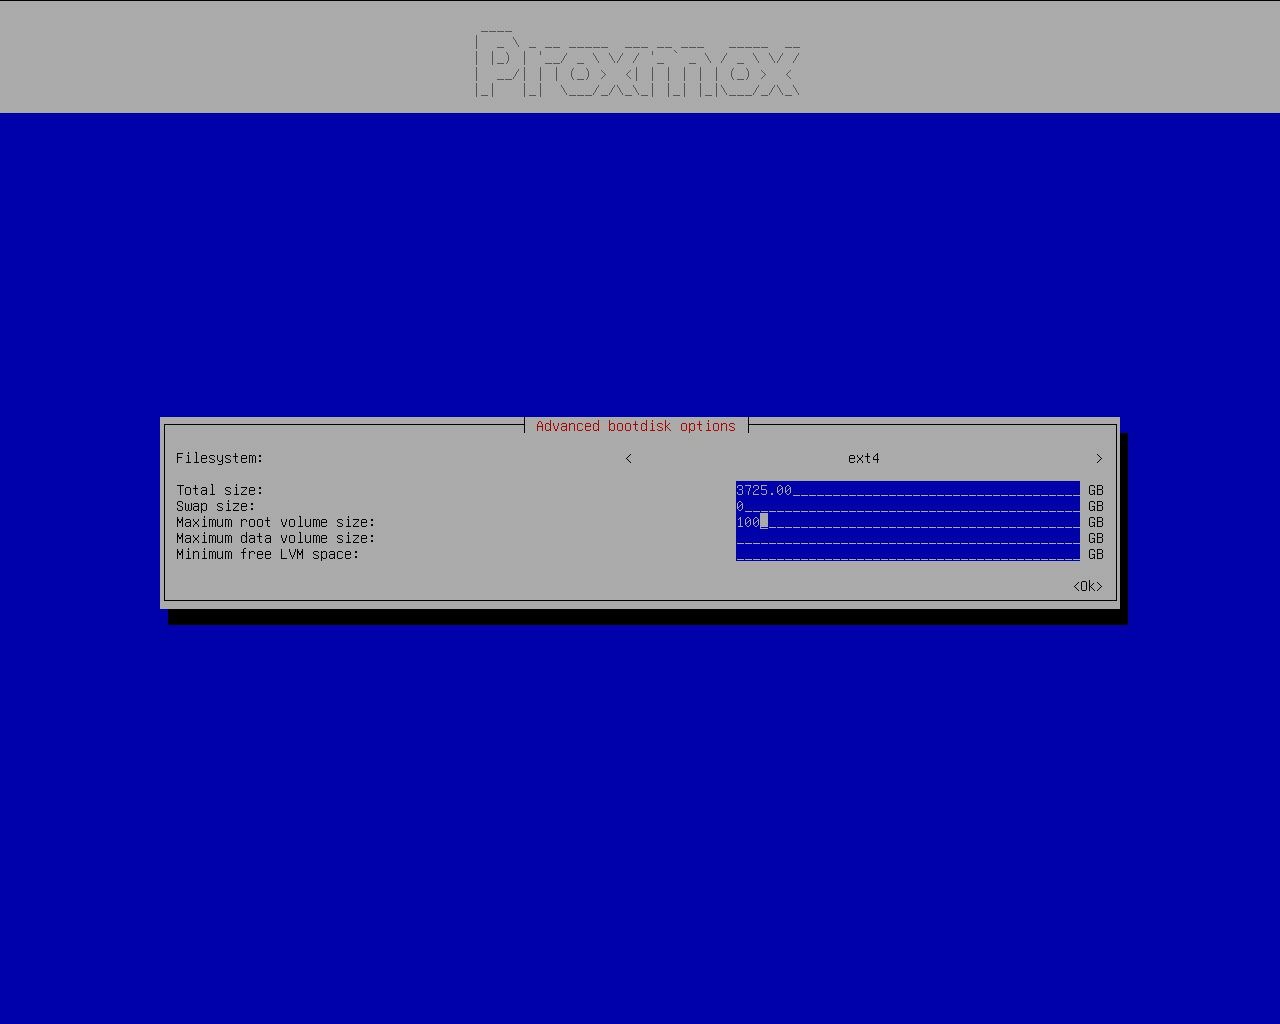
Toggle Advanced options. Keep ext4, we will not be using ZFS. I know ZFS has CoW, snapshotting, compressing, checksums, and a ton of other features. But we will not use ZFS, because it will potentially cause some problems, e.g., high IO load when using RAID-Z zvols, extremely slow container start times when using ZFS storage driver in Docker, SSD write amplifications, low SSD random read/write performance, ZFS ARC not being given back to the OS as fast as needed on high memory pressure systems leading to OOM, and a ton of other issues that I previously encountered. To save me some trouble, I will use the battle-tested ext4.
- Total size: keep as-is
- Swap size: 0, we don’t need it, our memory is large enought (1TiB) and we will later use ZRAM as swap
- Maximum root volume size: 100 (GiB), make it slightly larger so we can install things into the root volume, but not too large to occupy the data volume space.
Other options can be left empty.
Other install steps (Keyboard setup, root password) can proceed as you normally would do. Remember to set a complex root password.
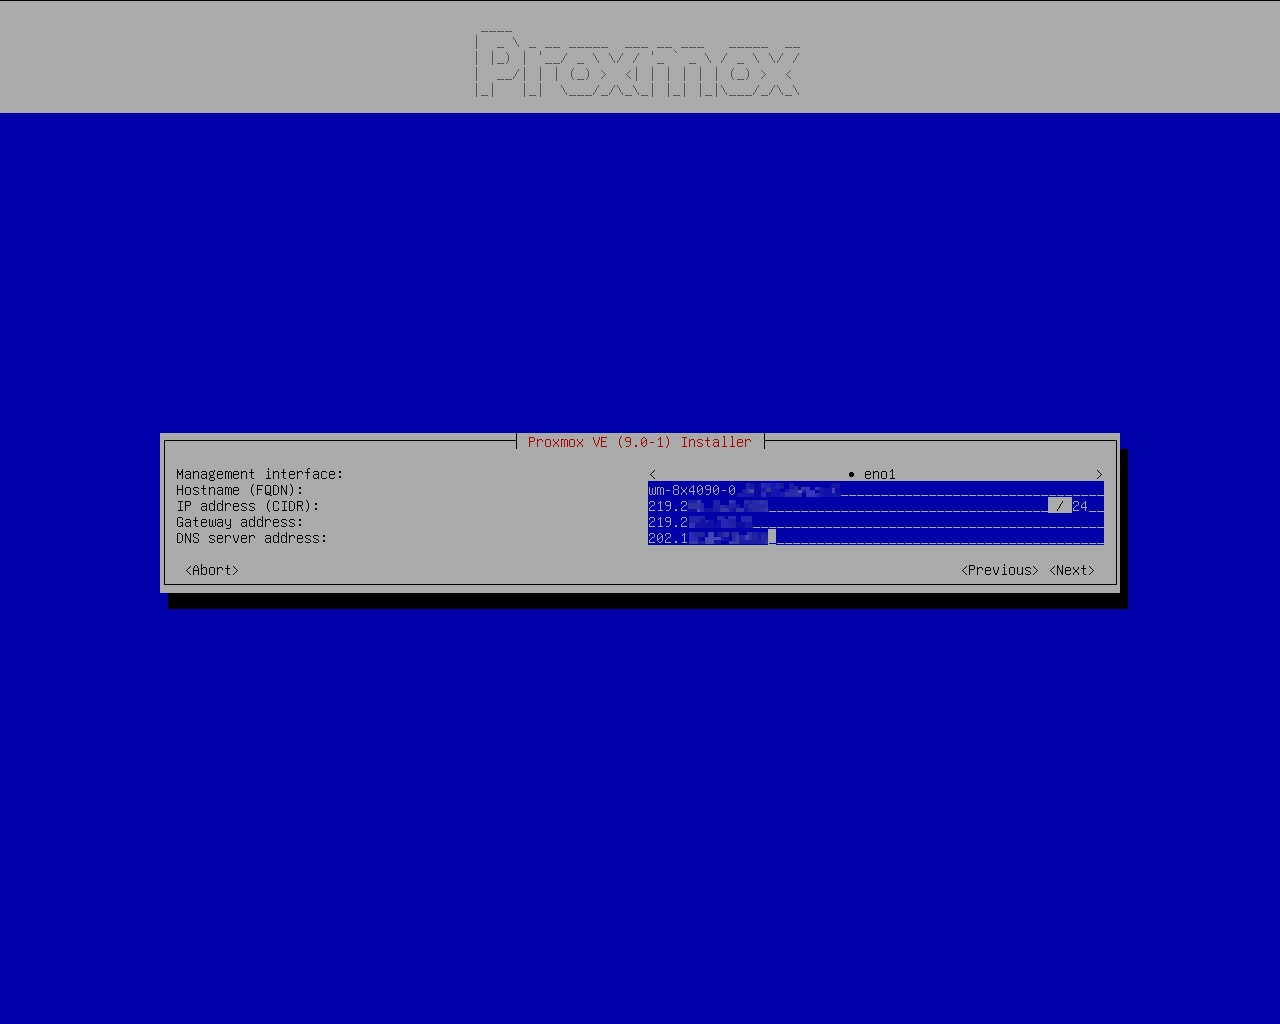
Regarding to IP addresses:
If you are going to use a static IP address like I do, you can just set it here and forget about it.
If you are going to use a dynamic (DHCP) addresses, you should keep what’s already in here (static IP). You don’t need to change anything. The valid IP address should already be automatically discovered from DHCP servers and filled in. After the installation, you can change the static IP mode to DHCP mode by running
vi /etc/network/interfacesand make the following edits:1 2 3 4 5 6 7 8auto vmbr0 - iface vmbr0 inet static + iface vmbr0 inet dhcp # Enable DHCP and remove static IP. - address 10.112.154.220/16 - gateway 10.112.0.1 bridge-ports eno1 bridge-stp off bridge-fd 0After you enabled DHCP in the config, apply it by
ifreload -a. Check if it takes effect byip a show vmbr0, you should see something likevalid_lft 7160sec preferred_lft 7160sec. If there is noxx secinside it, your DHCP is malfunctioning.1 2 3 4 5 6 7root@z8:/etc/network# ip a show vmbr0 4: vmbr0: <BROADCAST,MULTICAST,UP,LOWER_UP> mtu 1500 qdisc noqueue state UP group default qlen 1000 link/ether 30:13:8b:6d:3a:a6 brd ff:ff:ff:ff:ff:ff inet 10.112.154.220/16 brd 10.112.255.255 scope global dynamic vmbr0 valid_lft 7160sec preferred_lft 7160sec inet6 fe80::3213:8bff:fe6d:3aa6/64 scope link valid_lft forever preferred_lft forever
Proxmox VE Post-Installtion
Log in as root as we will make a few modifications.
Change APT Sources
In China, we don’t really have a good global Internet connection, so we will change APT source to mirrors in China.
| |
Remove enterprise repo and add no-subscription repo.
| |
Change CT Template Sources
Use mirrors in China.
| |
Stop Cluster Services
We are not using PVE clusters. Disable them. If you are using PVE clusters, you probably will not be reading this guide :P
| |
Install Common Tools
Useful tools that will be used regularly.
| |
Configure Shell
I like ZSH and my dotfiles, so I will use them.
| |
| |
Configure ZRAM Swap
| |
Change config to use zstd as the compression method.
| |
Apply
| |
Tune kernel parameters to make better use of ZRAM
| |
Apply
| |
Enable IPv6 SLAAC
Proxmox disables IPv6 by default. To enable IPv6 SLAAC:
| |
Apply it
| |
TRIM Optimizations
TRIM will help prolong SSD lifespan and maintain performance. Enable it on the LVM thin pool.
| |
Since LXCs are just on the host, it will automatically issue discards if the underlying storage supports it, so no further action is needed. If you are using VM, be sure to use SCSI disks (VirtIO SCSI Single) with discard=on option. I’ve heard that VirtIO Block devices will not work with dicards but I haven’t tested it yet. Correct me if I’m wrong.
Limit Journal Size
| |
Apply
| |
NVIDIA P2P Driver Installation
Instead of regular NVIDIA drivers, we will be installing P2P-enabled drivers to force enable PCIe P2P capabilities on consumer cards (like GeForce RTX 4090). This will bring performance boost (~10%) across multiple scenarios. For details, refer to my blog post: https://blog.chlc.cc/p/rtx4090-gpudirect-p2p-unlocked
Disable IOMMU
Since PCIe P2P in Linux doesn’t work so well with IOMMU-enabled systems (there are many potential issues you may run into), you may as well just disable IOMMU. Note that if you have more than 255 CPU cores, you will only have access to 255 CPUs due to APIC fallback.
To do disable IOMMU, you can either
- Disable Intel VT-d (AMD is on by default) in BIOS
- Disable
intel_iommuoramd_iommuin Linux kernel parameters
To disable intel_iommu or amd_iommu in Linux kernel parameters, use the following command to add intel_iommu=off and amd_iommu=off to your GRUB_CMDLINE_LINUX_DEFAULT. BTW: I also reduce the screen resolution to 1024x768 because it’s a server
| |
Reboot your system to see the effect.
| |
Make sure the follow command produces NO entries. If there are output, it means IOMMU is not correctly disabled.
| |
Disable ACS
You may need to disable ACS to get PCIe P2P to work, refer to https://docs.nvidia.com/deeplearning/nccl/user-guide/docs/troubleshooting.html (PCI Access Control Services)
Enable Above 4G Decoding
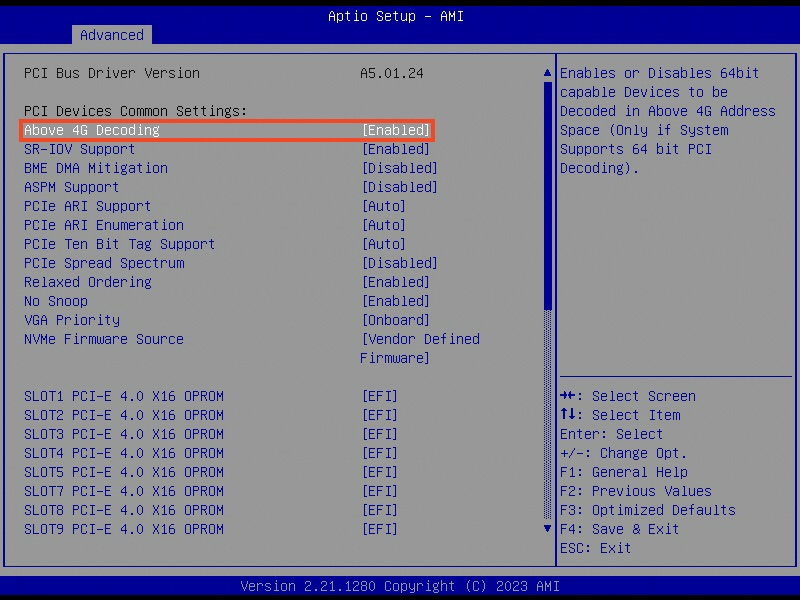
PCIe P2P will need to access each GPU’s memory, so the PCIe BAR should be large enough to cover GPU’s memory. You must enable Above 4G Decoding in your motherboard settings to make the PCIe BAR large enough to work. Enable it in your motherboard’s BIOS.
Install Official Driver
Before we install the P2P kernel module, we need to install the official drivers.
Since we are installing unofficial P2P kernel modules, there is a limited number of driver version that will work. The version of the P2P kernel modules MUST be the same as the official driver we are going to install.
Refer to https://github.com/tinygrad/open-gpu-kernel-modules to see what versions are available. I also have my patches that works with much newer driver versions (575.57.08) (at the time of writing) https://github.com/charlie0129/open-gpu-kernel-modules .
I will be using version 575.57.08, so we should download the official driver of the same version (575.57.08). You should download the .run file, e.g., NVIDIA-Linux-x86_64-575.57.08.run
| |
Skip kernel modules because we will install P2P-patched version later.
| |
Choose whatever you want, doesn’t matter.
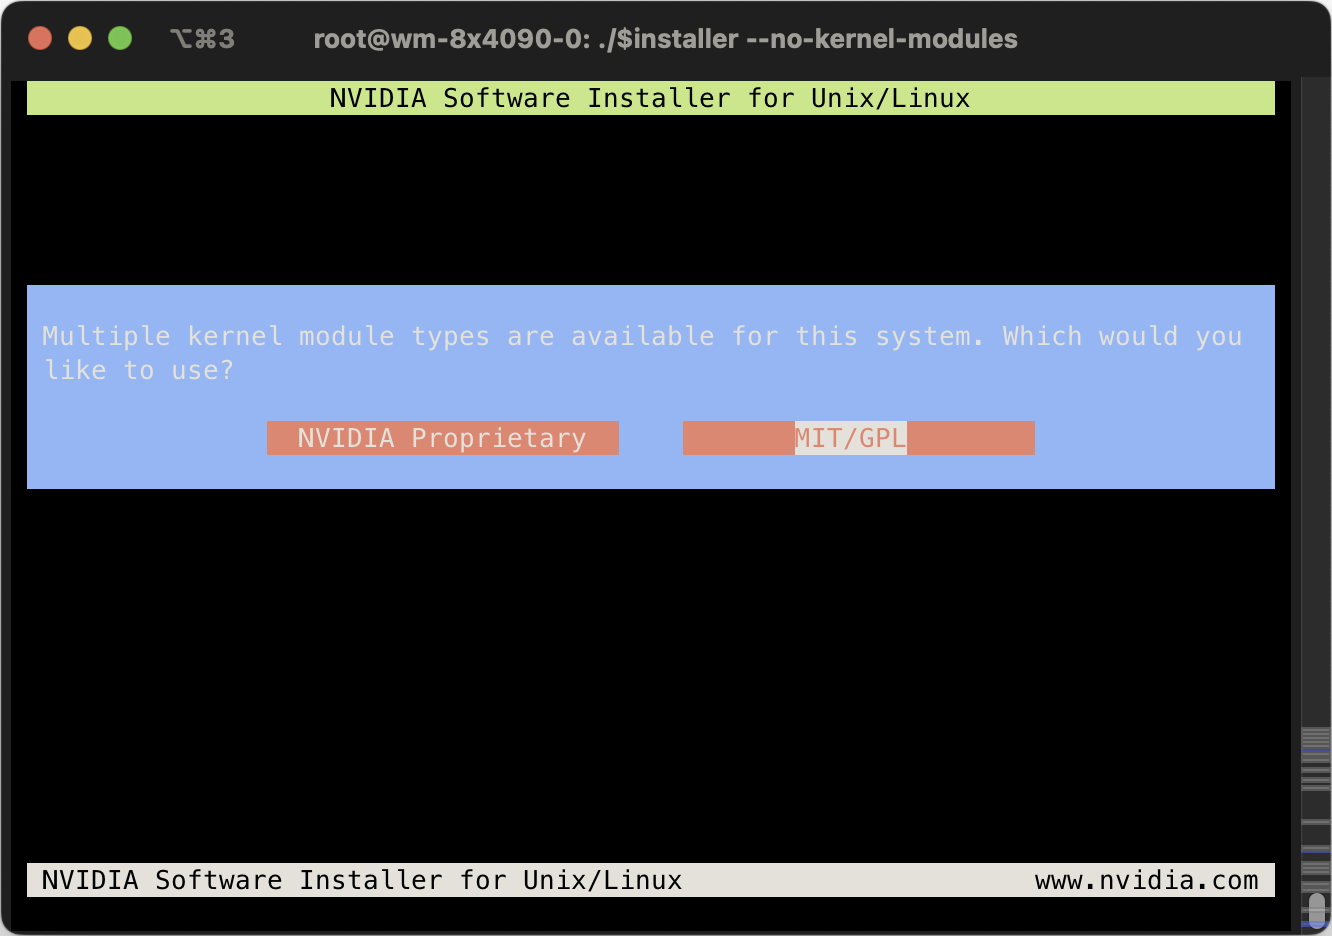
Yes, disable nouveau, we will be using NVIDIA drivers.
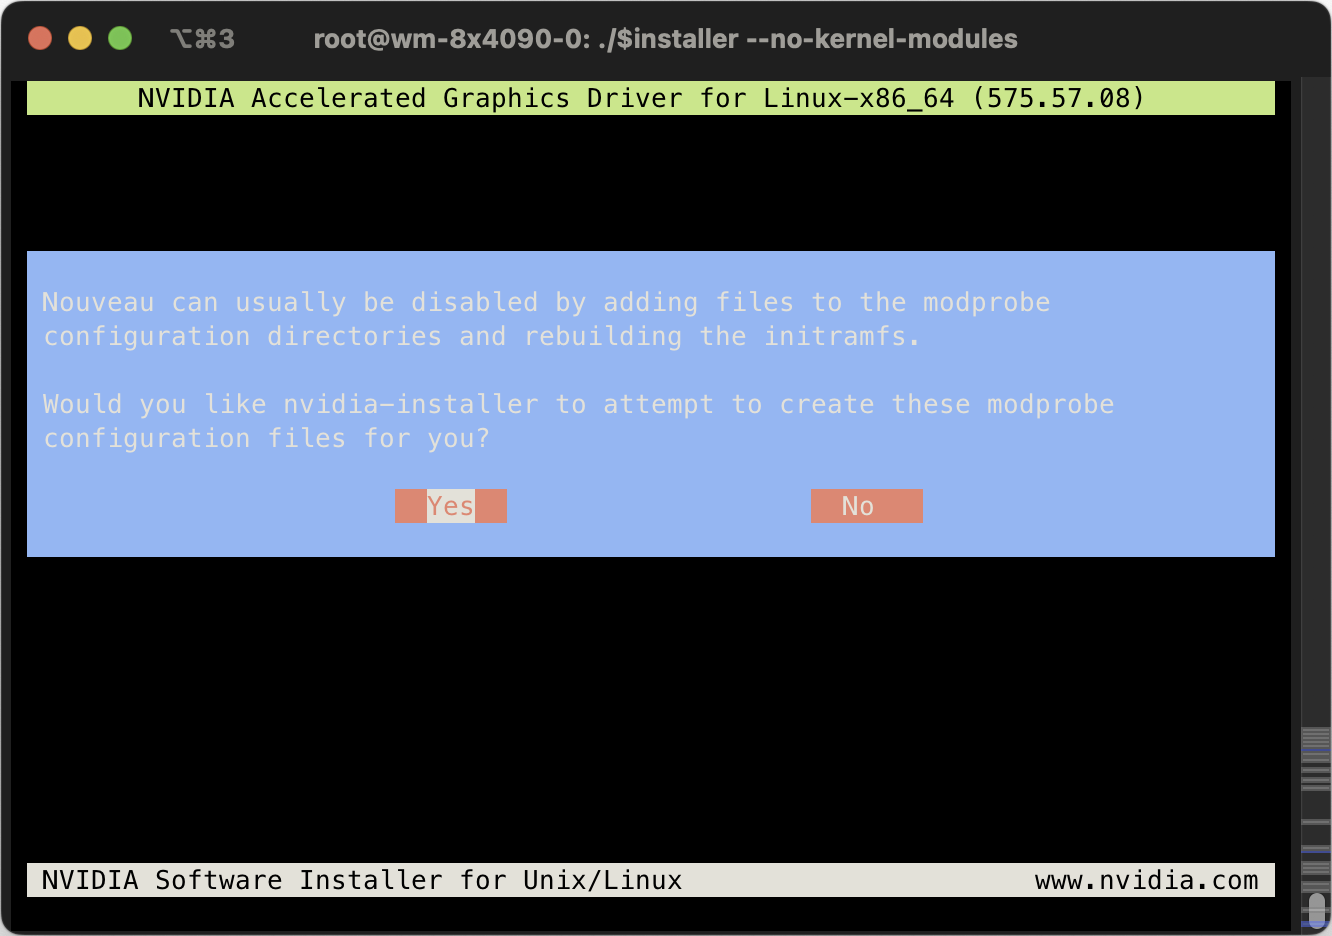
Do not abort, just continue. Nouveau will be disabled on next boot.
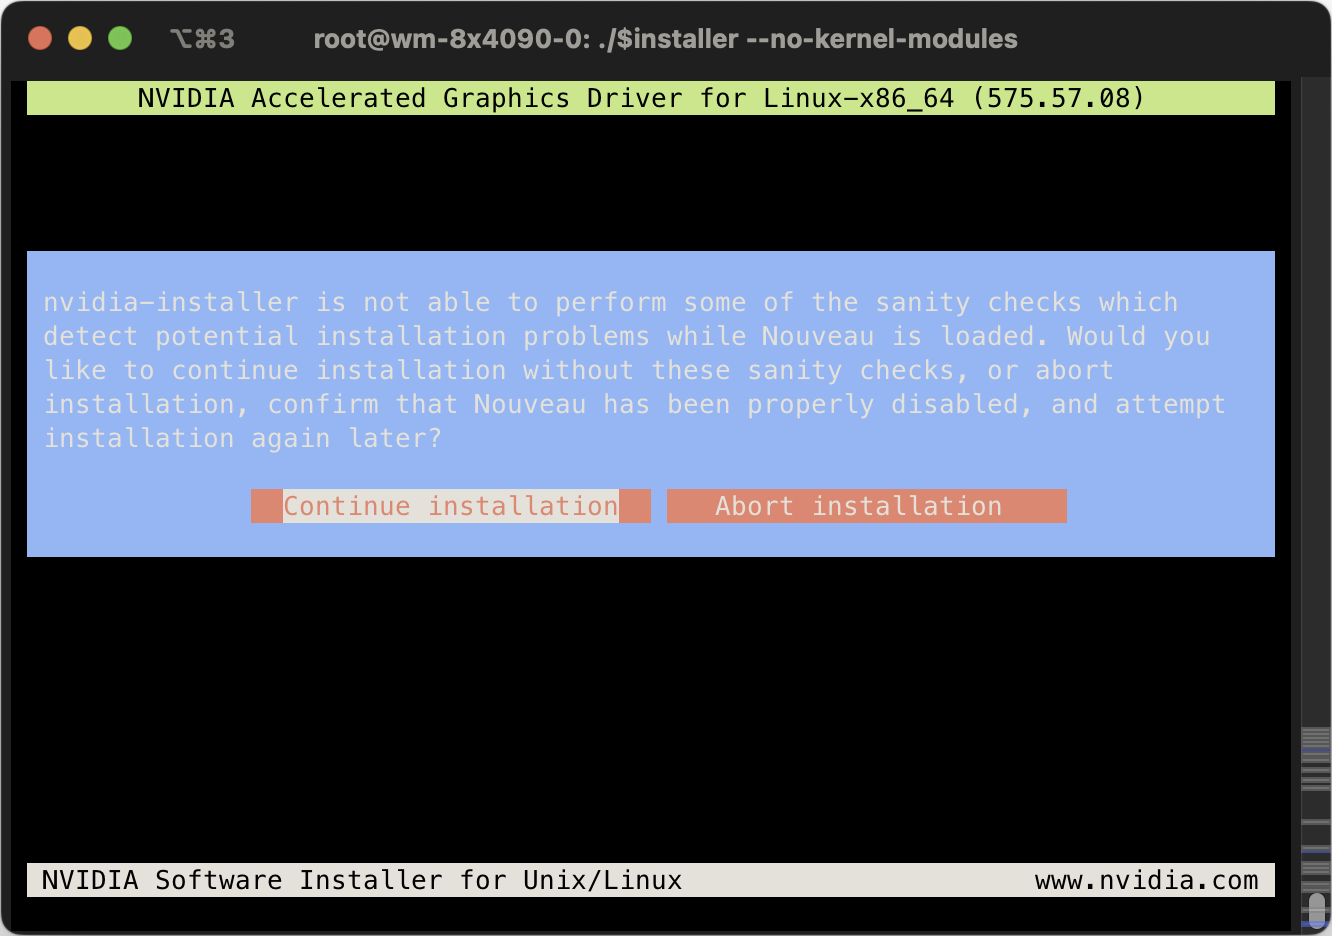
Just choose the default option for every step that comes later.
Remove the driver installation file because we will not be using it later.
| |
You can skip reboot now. We will reboot after we installed the kernel modules.
Install P2P-Enabled Kernel Modules
Make sure the version of the P2P-enabled kernel modules match the version of the driver. I will use veriosn 575.57.08.
| |
To build kernel modules, install build dependencies and kernel source. sudo installed because the install script uses sudo but we don’t have it now.
| |
Build and install the kernel module
| |
You can safely ignore the NVIDIA-SMI failure as long as the build succeeds (you should see a DEPMOD /lib/modules/6.14.8-2-pve line) because we haven’t rebooted yet (so NVIDIA-SMI can’t be used).
Remove the source after installing
| |
Reboot your system and you should see nvidia-smi running fine.
To tell if P2P is enabled, we will use a simple method (performance testing will be done later):
| |
You should see > 2048 MiB BAR1 Total memory, 32768 MiB in my case.
| |
Enable Persistence Mode
Persistence mode will:
- Keep the GPU driver running so program can start faster
- Lower GPU power mode when it’s idle to save power. For RTX 4090s, it can drop from ~70W to ~10W.
- Make sure
/dev/nvidia*device nodes are ready. This is useful because we are passing the GPU devices/dev/nvidia*to CTs (LXC Containers) later, it requires the device nodes to be present on start up for auto-started CTs.
So you really should enable it.
To enable persistence mode:
| |
To make it persistent across reboots, we will use a cron job.
| |
Add a line to run nvidia-smi on boot:
| |
Why not use
nvidia-persistencedsystemd service? Because for whatever reason, it does not initialize the device nodes/dev/nvidia*correctly, so auto-started CTs will encounterCuda failure 'unknown error'.
1 2 3 4cd /usr/share/doc/NVIDIA_GLX-1.0/samples tar jxf nvidia-persistenced-init.tar.bz2 cd nvidia-persistenced-init ./install.sh
You should feel nvidia-smi runs much faster than before.
Build CT Templates
We will build a CT Template that has everything a student will need:
- Common build dependencies
- CUDA
- Docker
- …
Download the Linux distro you want. I chose Ubuntu 24.04, not because I like Ubuntu (I use Debian), but because most students only know Ubuntu.
Create an unprivileged CT just like you normally would. Just remember to give it a bit more disk space (32GB or more) because we will install CUDA later and CUDA is really large.
Install Docker
After you created the CT, shut it down. Add additional settings to allow Docker to use overlayfs driver, otherwise Docker images will be extremely inefficient in CTs.
| |
All following commands should be run in the CT unless specified otherwise.
Add Docker configuration. Systemd journal is used as log driver to make use of previously configured journal size limit. By writing logs to a centralized location, it’s also useful if you want to write logs to memory to reduce disk writes (e.g. log2ram).
| |
Install Docker
| |
Revert Containerd Config
Docker modified containerd config. We will revert it to the default config.
| |
Add GPUs to CT
Choose which GPU you need to passthrough by looking for the index in nvidia-smi, or by ls -l /dev/nvidia*
| |
For example, if want to add all 8 GPUs (0, 1, 2, 3, 4, 5, 6, 7) to CT, I will need to run:
| |
Note the lxc.mount.entry: /dev/nvidiaX dev/nvidiaX none bind,optional,create=file lines. Each line represents a single GPU to add to the CT. I will add 8 GPUs, so I add 8 lines from nvidia0 through nvidia7. Remove or add them as needed.
Check if the GPUs are there inside CT:
| |
We haven’t installed drivers yet, so nvidia-smi is not available.
Install GPU Driver
Important: you should use the same driver version as the host (575.57.08 in my case).
| |
Just install as normal.
Now you should be able to use nvidia-smi and see the GPUs you added to the CT (8 GPUs in my case).
Install CUDA
Important: current driver version MUST be greater than (or equal to) the driver required by CUDA. For example, CUDA 12.9.0 will work on my machine because CUDA 12.9.0 requires 575.00, and my current driver version is 575.57.08 (greater than 575.00).
| |
Remember to deselect the driver (we already installed the correct driver):
| |
After CUDA installation, configure PATH and LD_LIBRARY_PATH per printed instructions.
| |
Note that you can use /usr/local/cuda instead of /usr/local/cuda-XX.X so it’s independent of CUDA versions.
Also add export CUDA_HOME=/usr/local/cuda to your shell rc file.
nvcc should be available after a shell reload:
| |
Install NCCL
You will need NCCL for most GPU-related communications.
You should find a NCCL that’s compatible with your CUDA version. For example, NCCL 2.27.3 is compatible with my CUDA version 12.9.
| |
Also add export NCCL_HOME=/usr/local/nccl in your shell rc file,
Install NVIDIA Container Toolkit
To run Docker containers with GPUs.
Note that the URLs below are mirrors in China. You can use original URL if you prefer.
| |
Configure Docker and Containerd to use NVIDIA Container Toolkit
| |
Since we are running inside unprivileged containers, we need to set no-cgroups to true
| |
Install NVIDIA Nsight Systems
So we can profile applications running on the GPU.
| |
Functionality Tests
NCCL
| |
P2P ON: NCCL_P2P_LEVEL=sys ./build/all_reduce_perf --minbytes 8 --maxbytes 128M --stepfactor 2 --ngpus 8 (change --ngpus accordingly)
P2P OFF: NCCL_P2P_DISABLE=1 ./build/all_reduce_perf --minbytes 8 --maxbytes 128M --stepfactor 2 --ngpus 8 (change --ngpus accordingly)
You should see a bandwidth increase after P2P is on.
CUDA P2P
| |
You should see lower GPU-GPU latency, higher bandwidth if P2P is on.
Prepare for Templating
Check if there are unnecessary files and remove them.
| |
Remove history
| |
Now, it’s ready for converting to a template. To give each student a new development container, just clone this template.
Other Minor Settings
RAID Card Write Back
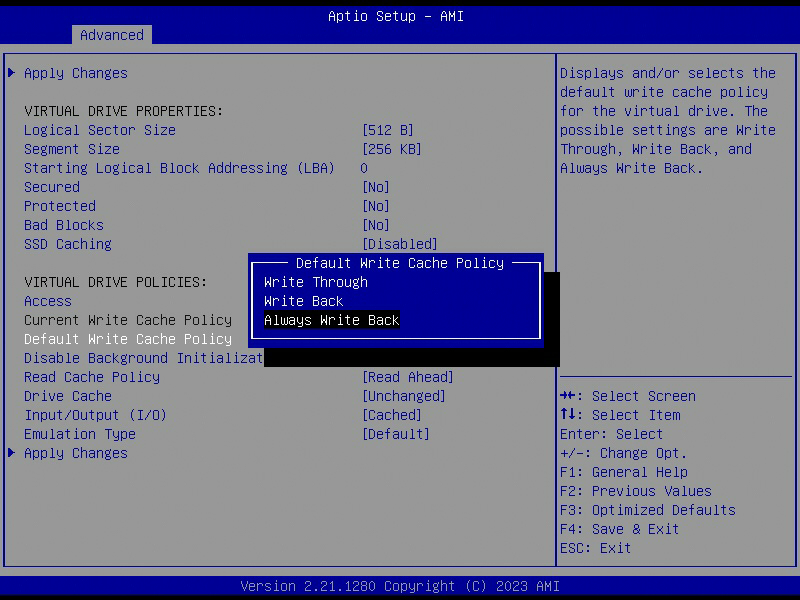
To achieve maximum write speed, you can enable write back mode on your RAID card, so data is written to cache first. This will significantly (yes, by A LOT, sometimes over 100x) improve random write speed on HDDs (SSDs are already very fast). If your RAID card has a battery, you don’t need to worry about data integrity in case a power failure.
Write cache policy:
Write Throuh: no cacheWrite Back: cached if battery backup is present on the RAID cardAlways Write Back: always cached
Obstacles
Only 255 Cores are Recognized - x2APIC
I noticed that I have one CPU offline. It should recognize 256 CPUs but I only have 255 CPUs.
| |
After some digging, I learned that I need to enable x2APIC on both the motherboard and kernel to have more than 255 CPU cores recognized.
In BIOS Local APIC Mode should already be x2APIC .
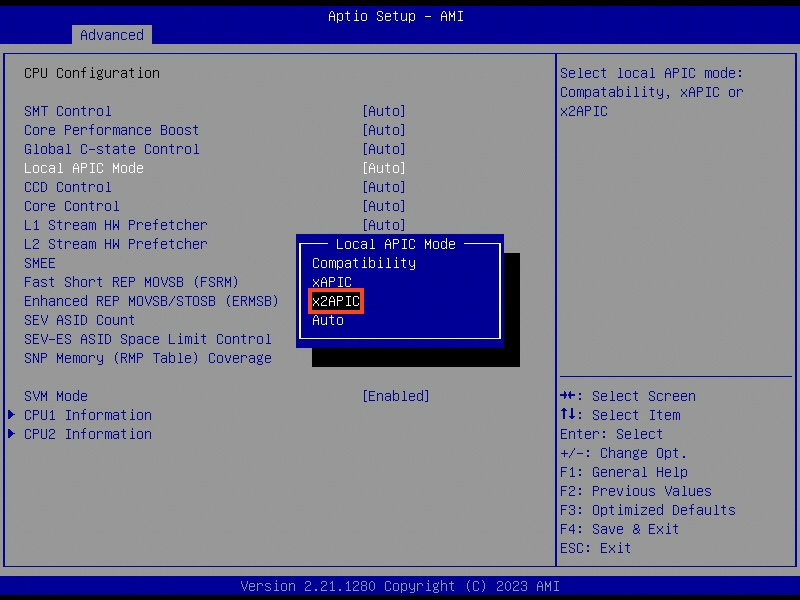
Now I realized it can be because I disabled IOMMU for PCIe P2P before. It turns out that disableing IOMMU can limit the number of available logical cores to 255. The reason is that the Linux kernel disables x2APIC in this case and falls back to APIC, which can only enumerate a maximum of 255 (logical) cores.
I will keep IOMMU disabled because I need PCIe P2P to function (I don’t want to deal with P2P with IOMMU on). Just forget about the 256th core :p.