I ordered an OVHcloud Kimsufi KS-5 dedicated server for 19.90 USD/month. It is not fast by modern standards, but it is a very usable small Proxmox box if you install it carefully.
The goal for this machine was:
- Proxmox VE on mirrored ZFS root.
- Keep only part of each SSD for the root pool.
- Use the remaining SSD space as a fast disposable scratch pool.
- Put VMs and CTs behind NAT, because the server only has one usable public IPv4 address and one
/128IPv6 address. - Keep host writes low where it is easy to do so.
This post is written from the actual KS-5 I installed. The finished machine is running Proxmox VE 9.2.
Hardware
The server I received:
| Part | Value |
|---|---|
| Product | Kimsufi KS-5 |
| CPU | Intel Xeon E3-1270 v6, 4C/8T, 3.8 GHz base, 4.2 GHz turbo |
| RAM | 32 GB DDR4 ECC 2400 MHz |
| Storage | 2x Intel P3520 450 GB NVMe SSD |
| NIC | 2x Intel I210 gigabit |
The PCI devices looked like this:
| |
The SSDs were not new in power-on hours, but the wear was low and both drives had no media errors:
| |
For a cheap dedicated server, that is acceptable.
Why Install Proxmox Manually
OVHcloud can install an OS for you from the control panel. I did not use that path for Proxmox.
The problem is storage layout. Proxmox works best when it owns the disks directly and can put ZFS on the raw devices. The OVHcloud installer tends to build layouts around mdadm RAID and regular filesystems, or it uses ZFS in a way that treats VM/CT storage more like ordinary directories. That leaves some Proxmox storage features unavailable or awkward, especially thin-provisioned disks and the normal ZFS-backed workflow.
So I installed Proxmox myself.
Format NVMe Drives as 4K LBA
Before installing the OS, boot the server into OVHcloud rescue mode and check the NVMe namespace formats.
My Intel P3520 drives supported both 512-byte and 4096-byte LBA formats:
| |
The drives defaulted to 512-byte LBA. Since these are enterprise SSDs and 4K was available, I reformatted both namespaces to format 3: 4096-byte sectors with no metadata.
This erases all data on the drive.
| |
After formatting, nvme list should show 4 KiB + 0 B:
| |
Open the IPMI KVM
In the OVHcloud console, open the IPMI KVM.
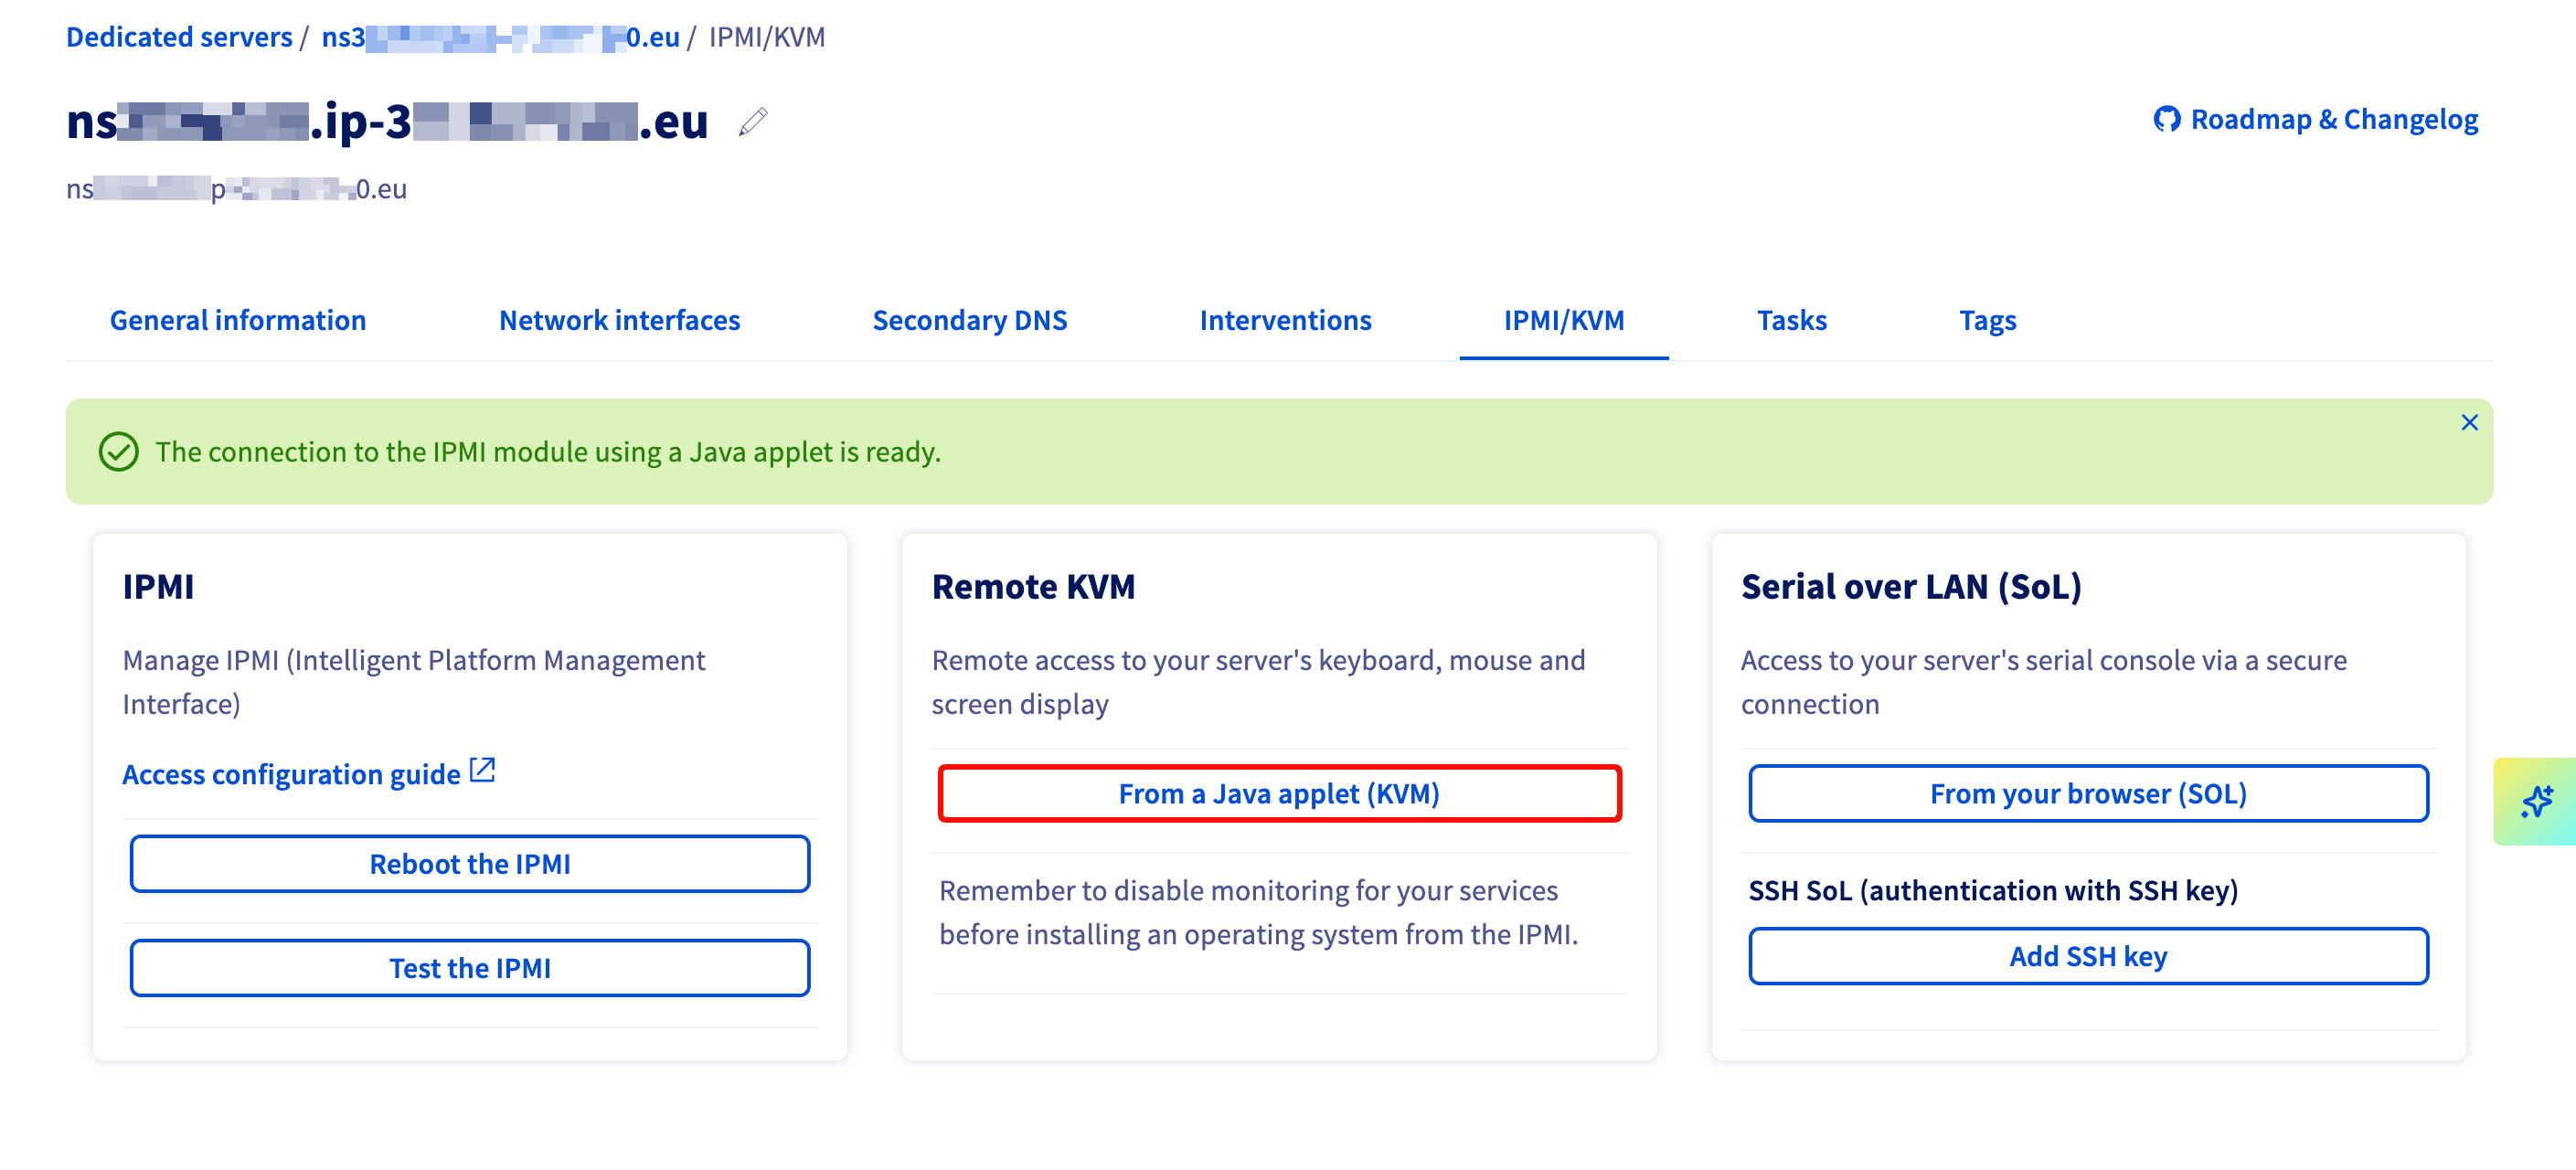
The KVM launches through an old Java JNLP applet.
One annoying detail: the IP address you use to access the OVHcloud console should be the same public client IP used when opening the IPMI KVM. I hit a failure mode where the KVM was blocked because I accessed them through different egress IPs.
The machine uses an Intel server board. The useful hotkeys are:
F2: BIOS setup.F6: one-time boot menu.
The boot logo confirms it is an Intel board:

You can mount a virtual ISO from the JViewer client:
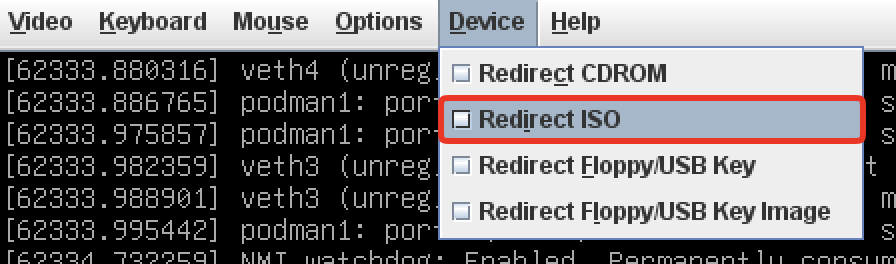
Then use F6 and choose the virtual CD-ROM:
| |
Do Not Stream the Proxmox ISO Through JViewer
My first attempt was to mount the Proxmox installer ISO directly in JViewer and boot it.
That technically works, but it was unusably slow. Even when I ran JViewer from an OVH server (which should have enough bandwidth), virtual media throughput was capped at around 64 KB/s. Installing Proxmox by streaming a full ISO through that path would take forever.
The fix is to boot a tiny netboot image first.
Boot Proxmox Through netboot.xyz
Download the netboot.xyz UEFI ISO, mount that ISO in JViewer, and boot it. The image is tiny, so the slow virtual media path is no longer a problem.
In netboot.xyz, choose:
| |
You can choose the debug installer if you want shell access between install stages. That is useful when something goes wrong.
netboot.xyz downloads the Proxmox installer over the server’s own network connection and then boots it. OVHcloud provides DHCP even for dedicated servers, so the installer had network access without manual IP configuration.
One caveat: after netboot.xyz hands off to the Proxmox installer, the installer does not use a serial console, so Serial over LAN will not work. You still need the JViewer window to see and control the installation.
Install Proxmox on ZFS RAID1
In the Proxmox installer, choose ZFS RAID1 across both NVMe drives.
I intentionally did not give the full SSDs to rpool. The installer has an hdsize option in advanced storage options. I set it to 128 GiB so the root pool would be a 2-way mirror, leaving the remaining space on both SSDs unused for a later scratch pool.
This is the important part: decide this during installation. Growing ZFS into extra space is easy. Shrinking an existing ZFS pool is not.
The final root layout on my machine:
| |
p3 on both drives is the mirrored root pool:
| |
p4 on both drives is the later scratch pool.
Optional Partition Alignment Fix
The Proxmox installer did not give me a perfectly round 1 MiB-aligned final size for the ZFS partition (nvmeXn1p3). If you care about this, fix it immediately after installation while the layout is still simple.
The safe method is:
- Use
fdisk /dev/nvmeXn1 - List partitions with
pand note the start/end sector of part 3. - Delete
dpart 3 - Create a new part 3 with the same start sector and a new end sector. Increase the end sector a bit, align
end sector - 1to 1M (256 4k sectors). - Do not wipe the ZFS signature.
- Write changes with
w. - Ask ZFS to expand into the recreated partition.
Example:
| |
Note that if you expanded the ZFS part too little (smaller than metaslabs size, typically 1GiB), ZFS may not actually expand the pool to use the empty space. This is fine.
Find the exact <device> with:
| |
This is not required for a working system. I did it because I wanted the 128 GiB root partition to be exact and aligned. So later partition 4 will not be misaligned either.
Fix OVHcloud Boot-to-Disk
After a manual install, the server may not boot straight into Proxmox even though the installation succeeded.
OVHcloud bare-metal boot is not just “BIOS loads local disk”. The normal path is roughly:
- The server PXE-boots from the public interface.
- OVHcloud DHCP gives the server its public IP and an iPXE loader.
- iPXE queries OVHcloud’s internal boot service.
- The boot service returns a script based on your configured boot mode.
- In boot-to-disk mode, iPXE uses
sanbootwith an EFI bootloader path.
If you installed through the OVHcloud panel, OVHcloud knows the EFI bootloader path. If you installed manually, that path can be missing or wrong.
When sanboot fails, iPXE falls back to rEFInd. rEFInd scans the EFI system partitions and may choose the wrong bootloader. In my case it picked memtest first:
| |
The rEFInd menu showed both memtest and systemd-boot:
| |
For Proxmox installed with UEFI and root-on-ZFS, the bootloader is systemd-boot:
| |
Set that path through the OVHcloud CLI:
| |
After that, boot-to-disk should go directly into Proxmox instead of falling through to rEFInd.
Basic Post-Install ZFS Settings
Enable TRIM on the root pool and set basic dataset properties:
| |
recordsize affects file datasets, not zvol block devices. For VM disks backed by ZFS zvols, check the Proxmox storage block size instead. On new Proxmox installations the default is already 16K; older installations may still use 8K. You can check or change it in:
| |
I also use a few ZFS module options:
| |
The intent:
zfs_txg_timeout=30: reduce idle write frequency.zfs_trim_txg_batch=128: make TRIM batching less tiny for NVMe.zfs_dirty_data_sync_percent=80andzfs_delay_min_dirty_percent=95: delay throttling until the dirty-data situation is actually serious.
These are not universal defaults. They fit this small host because the workload is mostly personal VMs/CTs and scratch tasks, not a database with strict latency guarantees.
Reduce Unnecessary Host Writes
I am not using Proxmox clustering on this server, so I disabled the cluster HA services:
| |
Limit persistent journald usage:
| |
Configure BBR
Use BBR with fq.
On Debian/Proxmox, a later default sysctl file can set net.core.default_qdisc=fq_codel after your file during boot. Use a late filename:
| |
Check it:
| |
Expected:
| |
Configure Swap
Always have swap when using ZFS, even with enough RAM. It gives the kernel somewhere to go if ARC does not shrink quickly enough under memory pressure, and it reduces the chance that the OOM killer targets useful applications.
I use ZRAM swap:
| |
You may use disk swap if you want.
My current host has a 38.8 GiB ZRAM swap device:
| |
SSH and Serial Console
I like SSH sessions to die quickly when the client disappears unexpectedly:
| |
Put that in sshd_config or a file under sshd_config.d, then restart SSH.
For emergency access, enable OVHcloud serial-over-LAN by adding a serial console to the Proxmox kernel command line:
| |
On my host, /etc/kernel/cmdline now contains:
| |
Scratch Storage
The root pool uses 128 GiB on each SSD. The remaining 290.2 GiB on each SSD is free for scratch storage.
I considered two options:
mdadmRAID0 + LVM thin + ext4/XFS.- ZFS striped pool.
The mdadm option may win in some microbenchmarks, but the management cost is higher. I used a ZFS striped pool because it is simple and good enough.
This pool has no redundancy. If either SSD fails, the scratch pool is gone. That is fine for my use case because it is scratch space.
| |
Current state:
| |
Properties:
| |
Use scratchpool/unsafe only for data you can recreate. sync=disabled lies to applications about sync writes.
mdadm + LVM Alternative
If you want the non-ZFS scratch layout, create one extra partition on each SSD and build RAID0:
| |
For alignment:
- mdadm chunk size: 128K. 128K is a good balance between performance and overhead for NVMe drives. If you want to maximize sequential performance, use larger values like 1M. But remember to align filesystem / LVM with this value.
- Data disks: 2.
- Stripe width: 256K.
- LVM data alignment: 1M is fine because it is a multiple of 256K.
NVMe (physical) → mdadm RAID0 → LVM PV → LVM LV / thin pool → filesystem
When you create LVM on top of RAID-0, you must ensure:
- LVM PE size = multiple of mdadm chunk size
- LVM PV starts aligned to mdadm stripe boundary
Create the LVM layer:
| |
When formatting a filesystem inside a VM or manually on the host, pass the stripe geometry:
| |
Fast but unsafe mount options for scratch data:
| |
For CTs, Proxmox does not make it convenient to set filesystem mount options on a normal CT mountpoint. If you need custom options, create the LV manually, mount it on the host, and bind-mount it into the CT:
| |
If your workload is random-write heavy and can fit on one SSD, skip RAID0 and LVM entirely. A single raw disk or single partition is often better for small random writes than a layered RAID0 + LVM-thin setup.
Using Scratch Storage in VMs and CTs
For VMs, add a virtual disk on the scratch pool. Enable discard and SSD emulation on the virtual disk. Inside the guest, enable periodic TRIM. When formatting the disk, make sure the filesystem is aligned to the underlying ZFS volsize or LVM stripe geometry. For example, if underlying ZFS volsize is 16K, use mkfs.ext4 -O bigalloc -C 16384 /dev/yourdisk. If the underlying storage is LVM+RAID, use the correct stride and stripe-width options when formatting.
For CTs, add a mountpoint on the scratch pool. ZFS mountpoints are automatically aligned. For LVM+RAID, make sure the filesystem is aligned to the underlying geometry. TRIM is handled by the host for ZFS mountpoints. For LVM+RAID, run pct fstrim on the CT.
To use the scratch pool for temporary data, you can use bind-mounts to mount common scratch directories to scratch disk mountpoints. This avoids changing the config for each applications such as Docker, containerd and etc.
Suppose the scratch disk is mounted at /mnt/unsafe, and you want to use it for Docker, containerd, and ~/.cache. Write the following lines in /etc/fstab:
| |
| |
TRIM
For ZFS pools:
| |
For VMs, enable discard and SSD emulation on virtual disks, then enable periodic TRIM inside the guest.
For CTs backed by ZFS mountpoints, the host handles it. For CTs backed by other storage such as LVM thin, run pct fstrim:
| |
Then run it from cron or a systemd timer. For example, weekly from cron:
| |
Proxmox Networking on a Single Public IP
Proxmox creates a bridge by default and attaches the physical NIC to it. That is usually the right setup when the server is in your own LAN.
It is not right for this Kimsufi server.
The server has one usable public IPv4 address and one /128 IPv6 address. It does not have a routed public subnet for VMs and CTs. If VMs are bridged directly to the public interface, they do not get usable public addresses.
So I do this instead:
- Put the public IPv4 and public IPv6 directly on
eno1, notvmbr0. By default, Proxmox puts the public IP on thevmbr0bridge, which is not what we want. You should move it to the physical interface. - Create
vmbr0as an internal bridge with no physical ports. - Put VMs and CTs on
vmbr0. - NAT outbound traffic from
vmbr0toeno1. - Port-forward selected inbound ports to service CTs.
Current /etc/network/interfaces:
| |
Enable forwarding:
| |
About NAT66: it is usually the wrong IPv6 design. If you have a routed IPv6 prefix, route it to your VM bridge. On this server I only have one /128, so NAT66 is the practical workaround if VMs/CTs need outbound IPv6.
NAT and Port Forwarding
NAT rewrites packet addresses as traffic crosses the host.
For outbound IPv4 NAT, a CT sends a packet like:
| |
After MASQUERADE on the host:
| |
Linux conntrack records that translation so the reply can be translated back and forwarded to the CT.
There is a Proxmox-specific caveat when the firewall is enabled on a VM or CT network interface (firewall=1). Proxmox places that interface behind an fwbr* firewall bridge. With bridge netfilter enabled, conntrack can record the connection while it crosses the firewall bridge, before it reaches the host’s normal NAT path. The later FORWARD rule can accept the packet, but POSTROUTING may reuse the already tracked non-NATed connection instead of attaching MASQUERADE or SNAT. The packet then leaves the public interface with its private source address and never receives a reply.
Put the firewall-bridge tracking in a separate conntrack zone by adding these hooks to the vmbr0 stanza in /etc/network/interfaces:
| |
The -C/|| guard matters on a dual-stack vmbr0: ifupdown2 can run the hook once for each address family.
The IPv4 rules cover MASQUERADE/SNAT, while the IPv6 rules are also needed when using NAT66. A characteristic symptom is that NAT works for a guest without the Proxmox interface firewall but fails for an otherwise identical firewall-enabled guest. In conntrack output, the broken flow’s reply destination remains the guest’s private address instead of the host’s public address. Allowing all OUT and FORWARD traffic does not fix it because this is a conntrack/NAT-path problem, not a filter-policy rejection.
Inbound port forwarding is DNAT. A client connects to the public server:
| |
The host rewrites the destination before routing:
| |
I use my own small tool, iptfwd, to manage these rules from a config file: charlie0129/iptfwd.
Example config for this topology:
| |
For IPv4, MASQUERADE is convenient. For NAT66, I prefer explicit SNAT to the public IPv6 address. IPv6 interfaces can have multiple addresses, and explicit SNAT makes the translated source predictable.
If you do not want to use iptfwd, the equivalent basic iptables rules are:
| |
Before setting up DHCP, test NAT manually:
- Create a CT on
vmbr0. - Set IPv4 to something like
10.187.54.100/24. - Set IPv4 gateway to
10.187.54.1. - Set IPv6 to something like
fc10:187:54::100/64. - Set IPv6 gateway to
fc10:187:54::1. - Test:
| |
If that fails, debug NAT before adding DHCP.
DHCP and DNS with Pi-hole
I use Pi-hole as DHCP and DNS for the private bridge because it has a nice web UI and makes static leases easy.
Create a small Alpine CT:
- Bridge:
vmbr0. - IPv4:
10.187.54.2/24. - IPv4 gateway:
10.187.54.1. - IPv6:
fc10:187:54::2/64. - IPv6 gateway:
fc10:187:54::1. - CPU: 1 core is enough.
- RAM: 128 MB is enough.
- Disk: 512 MB is enough.
Install Pi-hole:
| |
If you forget the web password:
| |
Reduce query-log database writes:
| |
In the Pi-hole UI:
- Enable DHCP for
10.187.54.0/24. - Set the router/gateway to
10.187.54.1. - Configure DNS as desired.
- Disable NTP sync under
Settings -> All Settings -> Network Time Sync. Uncheckntp.ipv4/ipv6/sync.active. An unprivileged CT cannot set system time anyway.
Alpine log cleanup I use for small CTs:
| |
Host Monitoring
I keep monitoring tools in Podman containers instead of installing everything directly on the Proxmox host.
Install Podman:
| |
On current Debian/Proxmox, Podman should use overlay storage on ZFS:
| |
Expected:
| |
Make podman-restart.service also handle containers with restart-policy=unless-stopped:
| |
Enable the Podman socket and Docker-compatible CLI:
| |
An example monitoring compose file:
| |
Service CT
I keep public-facing services in a separate CT and forward only selected ports from the host.
Create an unprivileged Alpine CT on vmbr0, then:
| |
Add this to /etc/ssh/sshd_config:
| |
Install Podman inside the CT:
| |
Also check out the Pi-Hole setup section for Alpine log cleanup and other small CT optimizations. You must do this because Alpine does not have log rotation by default. You disk will fill up if you do not manage logs.
Then run Caddy or Traefik in that CT for reverse proxy and TLS termination. Forward 80 and 443 from the host to the service CT with iptfwd or iptables.
If you use a privileged CT with Podman over ZFS, you may need an overlay mount helper:
| |
I prefer unprivileged CTs unless there is a specific reason not to use them.
SMTP Notifications
By default, Proxmox may send mail directly and anonymously to the email address you entered during installation. Some providers reject that mail.
Configure a real SMTP target instead:
| |
Final State
The host ended up with:
- Proxmox VE 9.2.
- Mirrored ZFS root pool on 128 GiB from each NVMe SSD.
- Striped ZFS scratch pool on the remaining SSD space.
- 4K LBA on both NVMe drives.
- Private-only
vmbr0for VMs and CTs. - IPv4 NAT and IPv6 NAT66 from
vmbr0toeno1. - 80/443 forwarded to a service CT.
- Pi-hole handling private DHCP and DNS.
- Podman-based host monitoring.
For 19.90 USD/month, this is a surprisingly useful little virtualization box.